Saturday, August 20, 2016

The Tale of the Front Door*

Once upon a time, there was a strong, beautiful, white-painted wooden door. It had an antique brass knocker and antique brass door handle.  It sat under a tarnished copper porch surrounded by intricate wrought iron pillars. 

Over the years, it grew to look shabby and in need of repair. The door was as good as ever, but now there was a rusted, dented old storm door on the front. The trim was in need of new paint, and the wrought iron work needed to be scraped and repainted.


A new family moved in and began making changes to the house. The door began to hope its turn would be soon. After all, a front door is often the first thing a person notices when they go by or come to visit. When painters came and scraped, sanded and repainted the trim and wrought iron, the door was excited. Perhaps it was next on the list! But no, the poor door had to wait through the long, cold winter for its turn.


Then one spring day, some men came and took away the old, rusted storm door. It had protected the wooden door from the weather for years, but now it was time for a new storm door.


What a change! Suddenly, the whole door could be seen! The owners laughed and wondered why in the world they hadn't made this change earlier. Now the front door was inviting and beautiful to look at.


But, wait. It's actually not quite done. The owners of this house like splashes of color, and for months now, one of them had been trying to decide just what shade to paint the door. White is classic, but it wasn't quite right for this door. So, to the door's delight, it got a face lift too. Finally.


*Yes, this is the silly stuff I come up with after tucking the kids to bed when Dan is working and I am trying to avoid things like canning tomatoes or finishing painting trim somewhere in the house.

Wednesday, June 1, 2016

Bathroom Updates

The work goes on here. Sometimes I think we will get to a stopping point, but then we just keep moving on to the next project. This time it is the bathrooms.  We have one full bath and one half bath.

Before moving in we had new tile put in the half bath because what was in there was so old and gross. The flooring in the full bath was only slightly better, but once I scrubbed it with steel wool, it was at least clean, if not pretty.

The walls in each room are old ceramic tile which has held up really well. The grout looked pretty dingy, so we figured regrouting it would make a huge difference. Plus, I've read that taking out old tile is really hard, messy work (think cement and wire mesh), so we decided to see if we could just make a few changes and freshen it up. I like some retro finishes, and I think this tile is original to the house, so it fits with the overall character.

BEFORE


DURING


Sink, toilet and radiator removed. 


Old flooring out. Best vacuuming help around.


New floor tile. Fresh white grout on the wall tile, charcoal grout on the floor. We've kept the old medicine cabinet (partly because we couldn't get it out even after taking all the screws out) but replaced the lights on either side. Trim is white and you can see we have a bright teal for the walls.


Marble threshold. 


The door and closet doors have been removed. I took them to a local "dip and strip" place so they can remove the paint and sand them for us, and then we'll refinish them and put on new hardware.

Thursday, May 19, 2016

Benchless Piano

It's just not as fun to play piano when you sit in a folding chair instead of on a piano bench. We were given a piano this past year, but it came without a bench or stool. So I began searching. Did you know it's kind of hard to find a decent used piano bench? Who knew it would end up being such an ordeal.


A few weeks ago I finally bought a piano bench from an antique store in New Jersey (yes, I drove to NJ for a piano bench).


What you can't tell from these pictures is that this fabric was quite dingy looking and dirty. I did kind of like the stitching, but decided it was too dirty to salvage.


I took off the lid/seat and sanded and painted the base black to match the piano. I stripped off the old upholstery and found the original upholstery underneath. The fabric looked like it was in good shaped but little fibers were flaking off, and it smelled a tad musty.


I went to my local upholstery fabric warehouse, bought some fabric that would coordinate with the drapes and recovered it. I kept the old original padding but put a layer of quilt batting over top for a little extra. I stapled the new fabric on and covered the raw edges with trim. I was planning to use upholstery tacks for the trim, like it was originally, but I opted for hot glue instead. We'll see how it holds up.


It feels a bit silly to post about this (and to be taking time to do this while I should be doing a bunch of other things), but it took me longer than I thought it would, and I am also so pleased to finaly have a finished piano bench. While it may have been cheaper to buy second hand and re-do it, it certainly wasn't simpler. Sometimes cheaper is simpler, and sometimes cheaper just means more work on my part. I enjoyed it overall, so it's not an issue, but it was a lot of time and work for a piano bench. Especially when the flower beds were calling my name and there are still piles of mulch in our driveway.

Susanna supervised while I screwed the seat back on, and then I promptly dug out the piano books my sister lent me.

I found the beginner book and decided to see how much I could remember. I forgot that these were the books I used during my 1 year of piano lessons many years ago. There was my name, written in pencil by the piano teacher, and there was the sticker chart at the back where I would earn a sticker if I practiced enough. (Confession: I cheated on those practice charts. It's true. I didn't like practicing but I really, really wanted my piano teacher to be happy with me. I'm guessing she probably knew I didn't practice as much as I said I did, but she never said anything...so I guess I wasn't a perfect child after all...)

I'm looking forward to more self-taught piano lessons this summer.


Monday, February 22, 2016

A Little More Kitchen


I actually took some staged pictures. Strategic pictures that don't show the messy piles of stuff I moved from the island so it would be nice and cleared off. Or the old fridge we haven't replaced. Or the baby toys strewn across the floor.

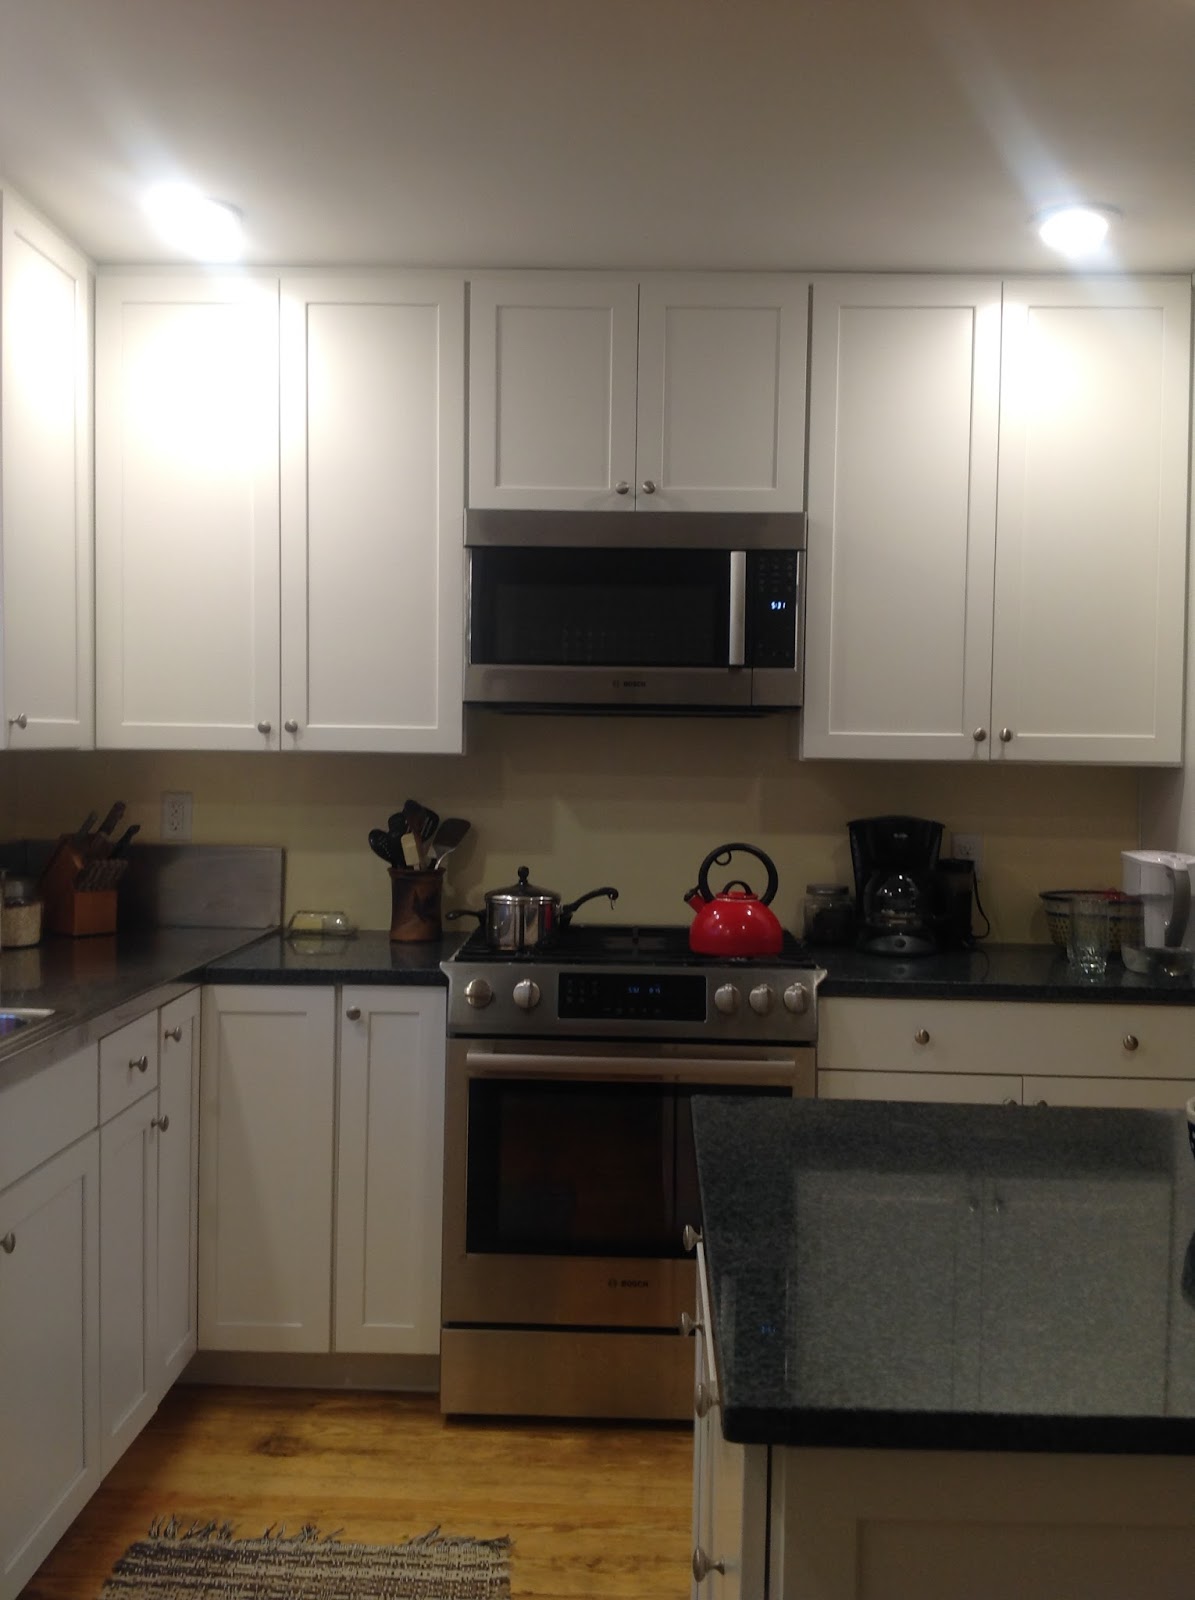
We've gradually added a few decorating touches to the kitchen here and there. I've painted the trim, bought new canisters, and finally made a decision about curtain fabric. So here are some recent pictures of how our kitchen looks when it's not in use (which is never, really.)


I was recently searching online for posts and photos of furniture and decorating styles from the late 1930s and early 1940s. Since our house was built in 1939, I figured I'd see what was in style during that time. I came across a picture on this site and had to chuckle because I hadn't really planned to follow a 1940s color scheme, but it appears that I did. When planning our kitchen, I liked the idea of using some retro ideas (white cabinets, for example), but aside from keeping the stainless steel counter top, we didn't try to re-use old cabinets or retro styled appliances. However, I do like the fact that our kitchen seems to fit, in some ways, with the time period the house is from.

1940s blue kitchen with linoleum flooring

Friday, February 5, 2016

Adventures with Slipcovering

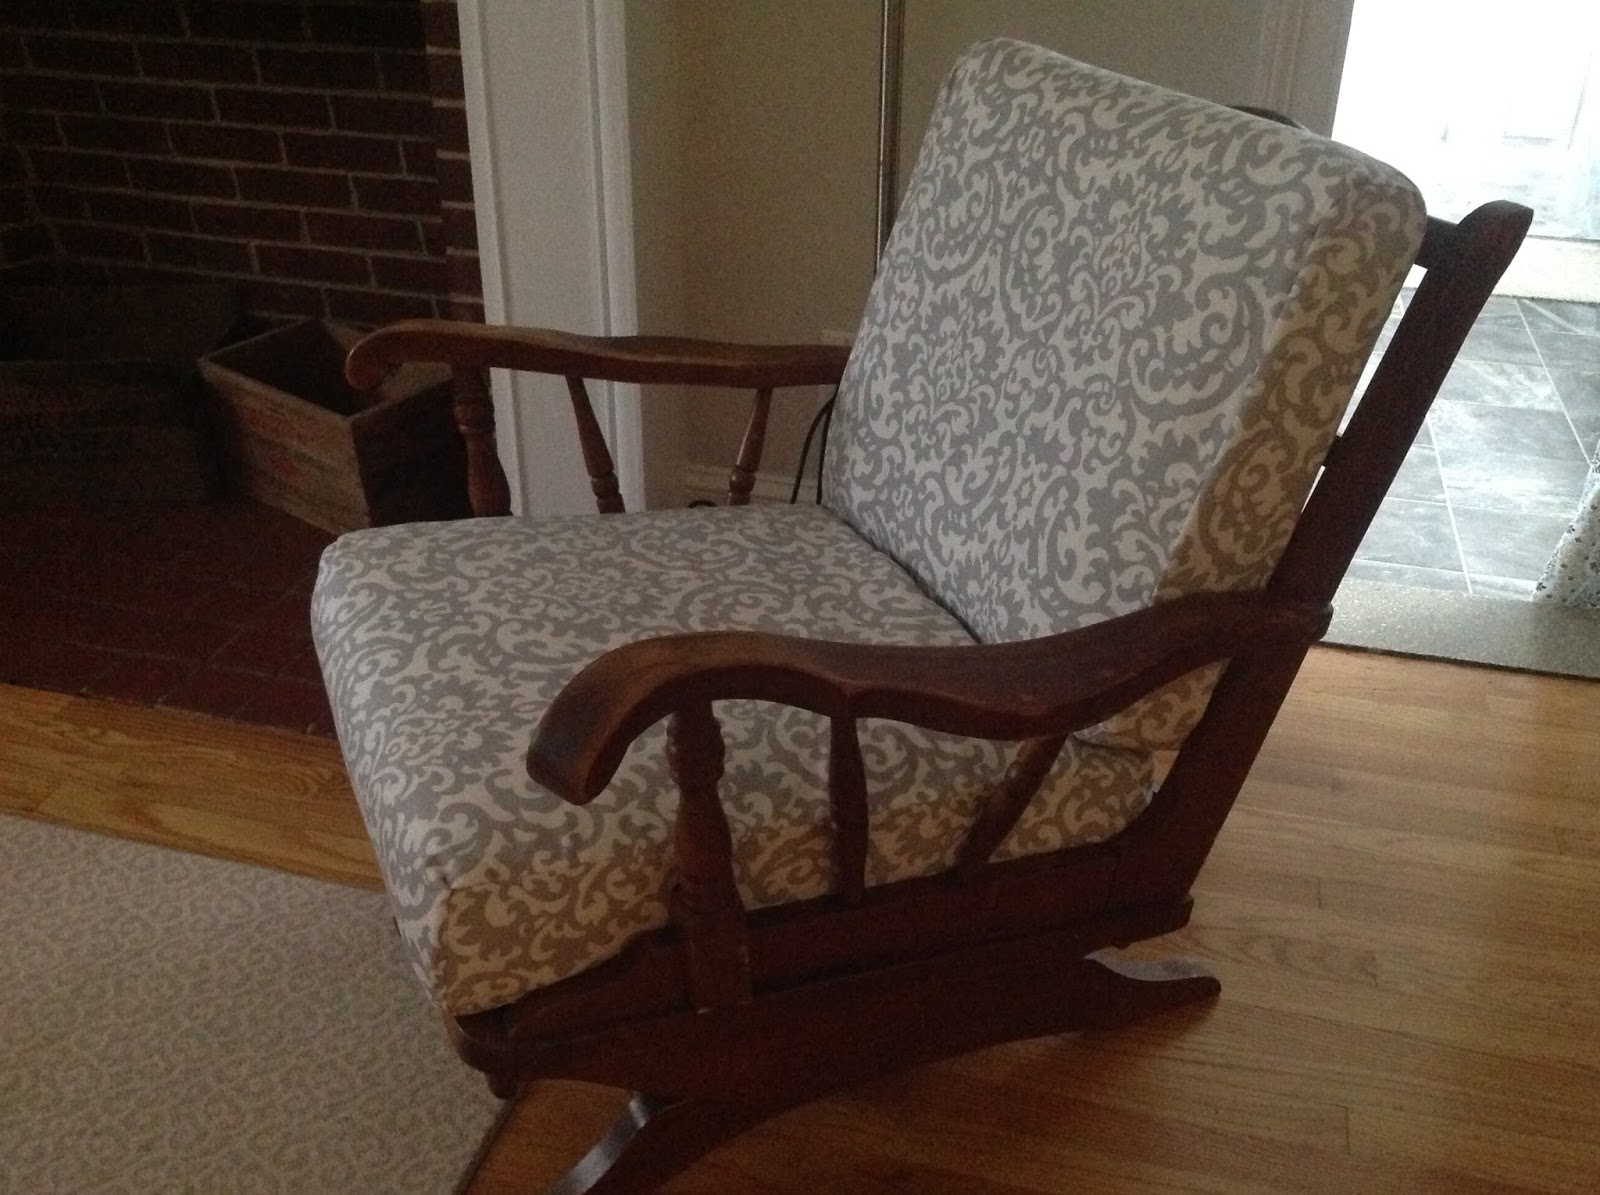
We have some old, comfortable chairs I inherited from one of my college friends (thanks, Jill!). I had sewn some very simple covers for them in college using cheap fabric that looked a bit like mattress fabric. But they were neutral and durable and they didn't clash with the other furniture in our college house. I kept that same fabric on them when Dan and I put them in our Baltimore row house, but over the past number of years and small children, they were looking pretty worn out.

We recently finished painting our living room (!!!), bought a sofa we liked and moved furniture into it. We decided to keep using these old chairs until we figure out what we'd like to replace them with. I do like things to look nice together, so I decided to recover them with some new fabric. They aren't amazing, but I'm pleased with how they turned out. I sewed the slip covers differently than I had the previous time, and it works better. I hand stitched one side on each cover. I thought this might take longer and be more tedious, but never underestimate how quickly work can go while watching a good TV show.


Here they are with the old fabric on them. I had basically sewn a pillow case-like cover with one long flap that I secured with upholstery screws.


My first fabric selection was pretty, but it really didn't look that nice with the couch or the wall color, so I just decided to consider this my "muslin".  This fabric would look nice on accent chairs, but I didn't really want to draw too much attention to these chairs. They aren't meant to be a focal point in the room. So back to the fabric store I went. We have a great interior fabric warehouse about 25 minutes away. Hundreds of rolls of fabric at discounted prices. So much better than buying online with samples or ordering through another store. I like being able to see the bolt in person.


And here is the finished product. I'm pleased with how it turned out. It's nice to have fresh. clean fabric that goes well with the new sofa and paint. I toyed with the idea of completely re-upholstering them, as opposed to making slip covers. Meaning, I would take off the original fabric, piping and buttons and re-do each of them. I decided that would be too much work - and work I'm not very experienced with - for this project. I just covered the whole cushion instead, and you can't even tell that I covered up piping and buttons.


I know the theories of making sure fabric patterns match up when re-upholstering and slip covering (it's one of the signs of good upholstery work), so I tried to be really careful to make sure I had the patterns going the same direction on top and bottom cushions. I even made sure that the placement of both top cushion pieces were the same. However, after cutting out the pieces, I realized I probably should have placed the fabric differently so that the pattern was more centered on a certain motif. But by that point, I had cut almost all the pieces and would have had to purchase more. Oh well. 


And just for fun, this is the fabric I got for our living room drapes. I am not sure when I'll get around to making them, but I like seeing the roll in my sewing room whenever I walk past. I'm a sucker for bright colors when it comes to curtains.


Thursday, October 8, 2015

Better Kitchen


It's not fair to post "before" pictures and then make you wait a long time for some "after" pictures. I snapped a few of the kitchen and dining room. It's basically one big room but with a distinct dining area, so I refer to them as separate rooms even though it's all one room. 

I just finished painting the walls last night. The trim still needs a final (or in some places two more) coat of paint after caulking and filling nail holes. We also need to put up some hooks and organize the kitchen entry way so bags and coats can be up off the floor. I also really, really need to wash the mini blind. That's on my list for next week. I plan to take it down and hose it off outside.

I didn't "stage" the rooms at all. I could have done that, but I just don't have the patience for it, so you get to see them as they are.

If you need to refresh your memory on how they looked before and during the work, just go to my previous post. Also, I should clarify, we weren't living here when doing the tearing out and really dirty work. We moved in after the kitchen was installed (sans countertops) and all the flooring was done. Lots of painting and trim work still needs to be done but that can be done here and there without too much extra dust and dirt.


So here is the kitchen. At some point, we'll have some other kind of blind at the window and a custom curtain of some sort. And some day we'll get a new fridge that fits the space made for it, but for now, we are using the one that came with the house. If you look closely at this picture and at the "before" picture of the kitchen, you will notice that we kept the stainless steel counter top that was in the house. We had some guys from a sheet metal shop pick take it and cut a new hole in it so we could have a bigger sink. The previous one was a shallow, single undermount sink. I like undermount sinks but not shallow small ones, and I was determined to have a double sink. So we just got a top mounted sink and had them make a hole to fit. I really, really like it and the fact that we were able to use this vintage piece!


Here's another view of the kitchen. You can see a flooring change from the dining area to the kitchen. This is because there was vinyl flooring in the kitchen originally, and so the builder had just used pine boards instead of oak. Dan spent hours taking off the vinyl and then steaming and scraping the old glue. That's why if you look closely, you can see there are still areas where the glue didn't come off completely, so we have this unique wooden floor. The pine was really light because it was covered up, but we think it's already beginning to darken, which is good, because I'm not really a fan of how the two flooring colors look side-by-side. But we had decided to not stain the pine because it should eventually darken to a similar color. And we're just considering it "character."


Here you can see our little back door entryway. Hooks will go in a row near the top of the wainscoting and I'd like to have some sort of organizational some-thing-or-other below. Suggestions??


 Here's a "before" of this space.


And here's the dining room side. The yellow looks brighter and darker at night. In daylight it's much more pale - which I prefer. As you can see, we have no storage here either, so that's on my list (china cabinet, corner cabinet, wash stand, something practical and nice...?).  I like wood, but with the floors and table, we have a lot of wood. I'm not really a fan of "shabby chic", so I don't think I want to go that route. I keep scouring craigslist and some local antique shops to see what might turn up. I'm open to suggestions! 


 The wrought iron railing came with the house. There are a number of wrought iron features and this is one of them. I'd like to get a bench of some sort to sit where all those baby things are, so that's another thing I've been looking for online. I even made a pinterest page for it! So we'll see. It will most likely look like this for a while.


 Eventually I'll paint that closet door as well. Don't let it's color fool you - it's not real wood but rather something called "graining". It was painted to look like real wood, but it's not. All the trim and interior doors in the house have this. But that will be a project for another time.

I hope you enjoyed the photos. I am really enjoying living in this space. The whole renovation process is an amazing one. I must say, I'm glad we're on this end of it (with the kitchen, at least!)


Thursday, October 1, 2015

It's Always Worse Before It's Better

At least, that's what I've learned about home renovations. You tear something out, it looks worse than it first did, but then once it's finished, it's better.

I'm really, really glad that I participated in this process before now. Otherwise, I think I'd be in a state of shock.

Let me show you what I mean...

Attic Before:


Attic During: 


Kitchen Before:


Kitchen During:


Sewing Room Before:


 Sewing Room During:


Family Room Before:


Family Room During:


Dumpster:
 One of your best friends when renovating a house.


Sorry for the poor quality on some of the photos. I was in a hurry when taking them. I'm just thankful I took some. Chances are if the pictures are blurry, I took them. If they are clear, Dan took them. One of these days, when things are more cleaned up, I'll snap some finished pictures. We finally got trim up in the family room, so it looks much better. Don't ask me when we'll get that trim painted, because it is pretty far down my to-do list. Right now we are trying to finish up trim in the kitchen and dining room as well as paint the old trim and paint the walls. So tools are sprinkled around here and there and almost everywhere.

I've been painting when I can in between school runs, grocery runs, miscellaneous errands, making meals, changing diapers, washing laundry and hanging it out to dry (our dryer is broken), canning applesauce and grape juice, keeping things semi-tidy, reading stories, breaking up sibling rows, watering potted plants, pulling weeds, sitting by the campfire, and relaxing now and then. I keep thinking it's taking so stinkin' long to get this dining room painted, but we are slowly making progress.